
getStart
1 | // package.json |
可以使用命令:npm run build来代替之前的npx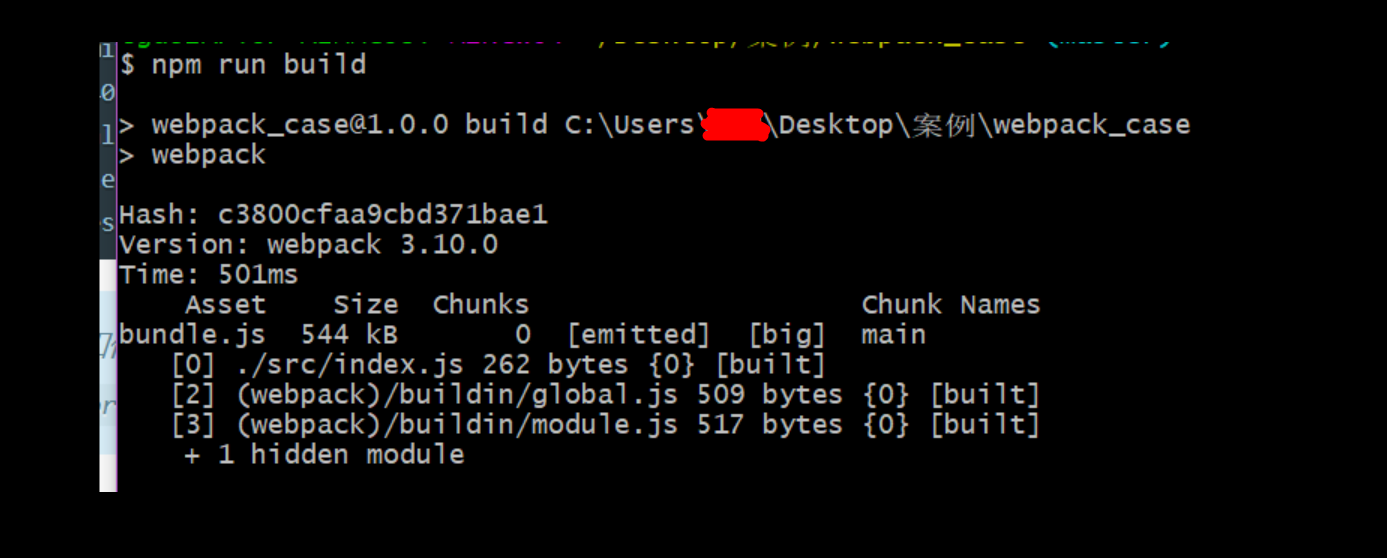
管理资源
加载CSS
- 安装
npm install --save-dev style-loader css-loader - 在
webpack.config.js中添加1
2
3
4
5
6
7
8
9
10
11
12
13
14
15
16
17
18
19
20
21const path = require('path');
module.exports = {
entry: './src/index.js',
output: {
filename: 'bundle.js',
path: path.resolve(__dirname, 'dist')
},
// S++++++++++++++++++++++++++++++++++++++++++++++++++
module: {
rules: [
{
test: /\.css/,
use: [
'style-loader',
'css-loader'
]
}
]
}
// E++++++++++++++++++++++++++++++++++++++++++++++++++++++
}
webpack 根据正则表达式,来确定应该查找哪些文件,并将其提供给指定的 loader。在这种情况下,以 .css 结尾的全部文件,都将被提供给 style-loader 和 css-loader。
- 在项目中创建
.css文件之后,在其他文件如index.js中使用import './stylus.css'引入,这样就可以使用了加载图片
- 安装
npm install --save-dev file-loader - 在
webpack.config.js中添加1
2
3
4
5
6
7
8
9
10
11
12
13
14
15
16
17
18
19
20
21
22
23
24
25
26
27
28const path = require('path');
module.exports = {
entry: './src/index.js',
output: {
filename: 'bundle.js',
path: path.resolve(__dirname, 'dist')
},
module: {
rules: [
{
test: /\.css/,
use: [
'style-loader',
'css-loader'
]
},
// start
{
test: /\.(png|svg|jpg|gif)$/,
use: [
'file-loader'
]
}
// end
]
}
}
加载字体
在
webpack.config.js中添加1
2
3
4
5
6
7
8
9...
// 加载字体
{
test: /\.(woff|woff2|eot|ttf|otf)$/,
use: [
'file-loader'
]
}
...引用字体文件,在css文件中可以通过@font-face定义引入
加载数据
- json文件webpack是内置的,可以正常运行;如果要导入xml,csv,tsv,可以使用
csv-loader和xml-loader - 安装命令
npm install --save-dev csv-loader xml-loader 在
webpack.config.js中添加如下代码:1
2
3
4
5
6
7
8
9
10
11
12
13
14
15...
// 加载数据
{
test: /\.(csv|tsv)$/,
use: [
'csv-loader'
]
},
{
test: /\.xml$/,
use: [
'xml-loader'
]
}
...这样就可以通过
import引入创建的数据文件了
管理输出(动态添加bundle向html文件中)
预先准备
webpack.config.js文件更改输入和输出分别是多个1
2
3
4
5
6
7
8
9
10
11...
entry: {
app: './src/index.js',
print: './src/print.js'
},
output: {
// filename: 'bundle.js',
filename: '[name].bundle.js',
path: path.resolve(__dirname, 'dist')
},
...
设定HtmlWebpackPlugin
- 安装
npm install --save-dev html-webpack-plugin 调整
webpack.config.js文件1
2
3
4
5
6
7
8
9
10
11
12
13
14
15
16
17
18
19
20
21
22
23
24const path = require('path');
// S++++++++++++++++++++++++++++++++++++++++++++++++++++++
const HtmlWebpackPlugin = require('html-webpack-plugin')
// E+++++++++++++++++++++++++++++++++++++++++++++++++++++++
module.exports = {
// entry: './src/index.js',
entry: {
app: './src/index.js',
print: './src/print.js'
},
// S++++++++++++++++++++++++++++++++++++++++++++++++++++++++
plugins: [
new HtmlWebpackPlugin({
// html中的title标签的内容
title: 'output Management'
})
],
// E+++++++++++++++++++++++++++++++++++++++++++++++++++++++++++
output: {
// filename: 'bundle.js',
filename: '[name].bundle.js',
path: path.resolve(__dirname, 'dist')
},
...HtmlWebpackPlugin会默认生成 index.html 文件,替换之前存在的index.html
清理/dist文件夹
- 通常每次构建之前会清理
/dist文件,安装npm install clean-webpack-plugin --save-dev - 调整
webpack.config.js文件1
2
3
4
5
6
7
8
9
10
11
12
13
14
15
16
17
18
19
20
21
22
23
24
25
26
27
28
29
30const path = require('path');
// S++++++++++++++++++++++++++++++++++++++++++++++++++++++
// 生成index.html文件
const HtmlWebpackPlugin = require('html-webpack-plugin')
//E+++++++++++++++++++++++++++++++++++++++++++++++++++++++++
// 清理/dist文件
const CleanWebpackPlugin = require('clean-webpack-plugin')
module.exports = {
// entry: './src/index.js',
entry: {
app: './src/index.js',
print: './src/print.js'
},
plugins: [
// S++++++++++++++++++++++++++++++++++++++++++++++++++++++
new CleanWebpackPlugin(['dist']),
// E++++++++++++++++++++++++++++++++++++++++++++++++++++++++
new HtmlWebpackPlugin({
// html中的title标签的内容
title: 'output Management'
})
],
output: {
// filename: 'bundle.js',
filename: '[name].bundle.js',
path: path.resolve(__dirname, 'dist')
},
Manifest
- 安装
npm install --save-dev webpack-manifest-plugin
开发(使用在开发环境中)
使用 Source Map(使调试更容易)
使用inline-source-map选项
- 调整
webpack.config.js文件1
2
3
4
5
6
7
8
9
10
11
12
13
14
15
16
17
18
19
20
21
22
23...
module.exports = {
// entry: './src/index.js',
entry: {
app: './src/index.js',
print: './src/print.js'
},
// +++++++++++++++++++++++++++++++++++++++++++++
devtool: 'inline-source-map',
// +++++++++++++++++++++++++++++++++++++++++++++
plugins: [
new CleanWebpackPlugin(['dist']),
new HtmlWebpackPlugin({
// html中的title标签的内容
title: 'output Management'
})
],
output: {
// filename: 'bundle.js',
filename: '[name].bundle.js',
path: path.resolve(__dirname, 'dist')
},
...
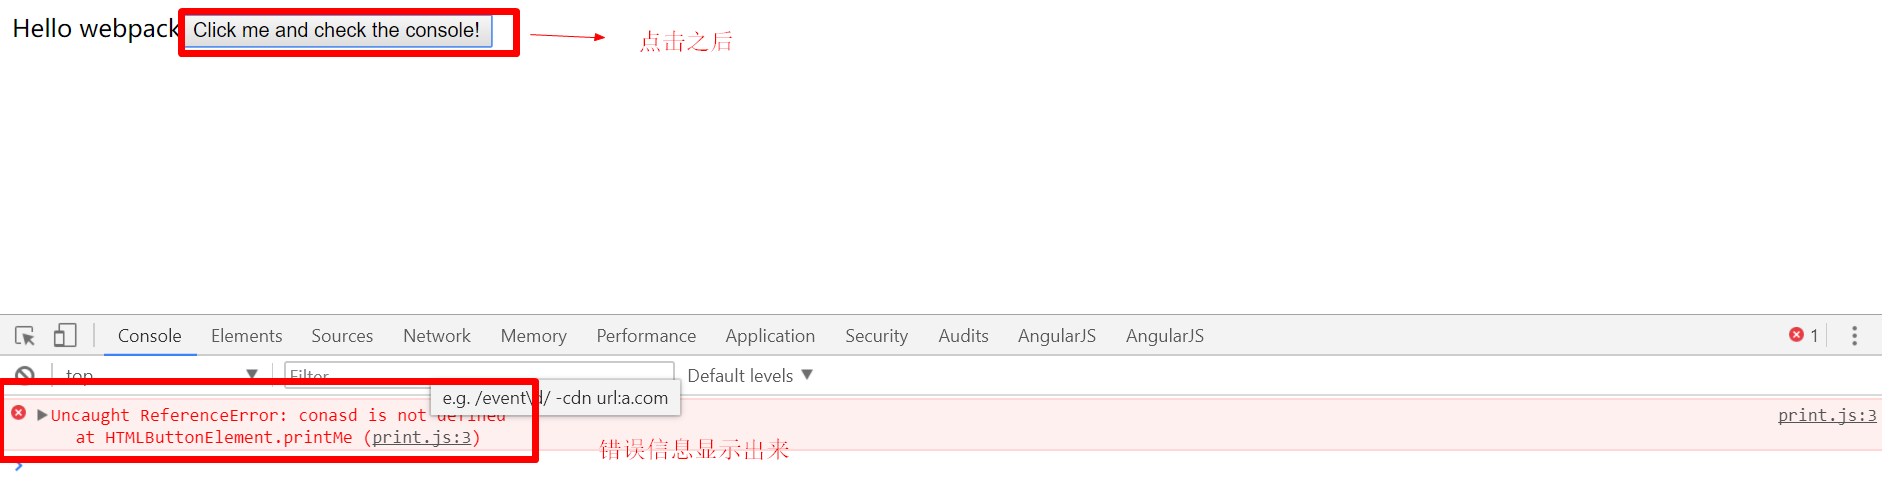
2.开始使用npm run build构建,不会报页面错误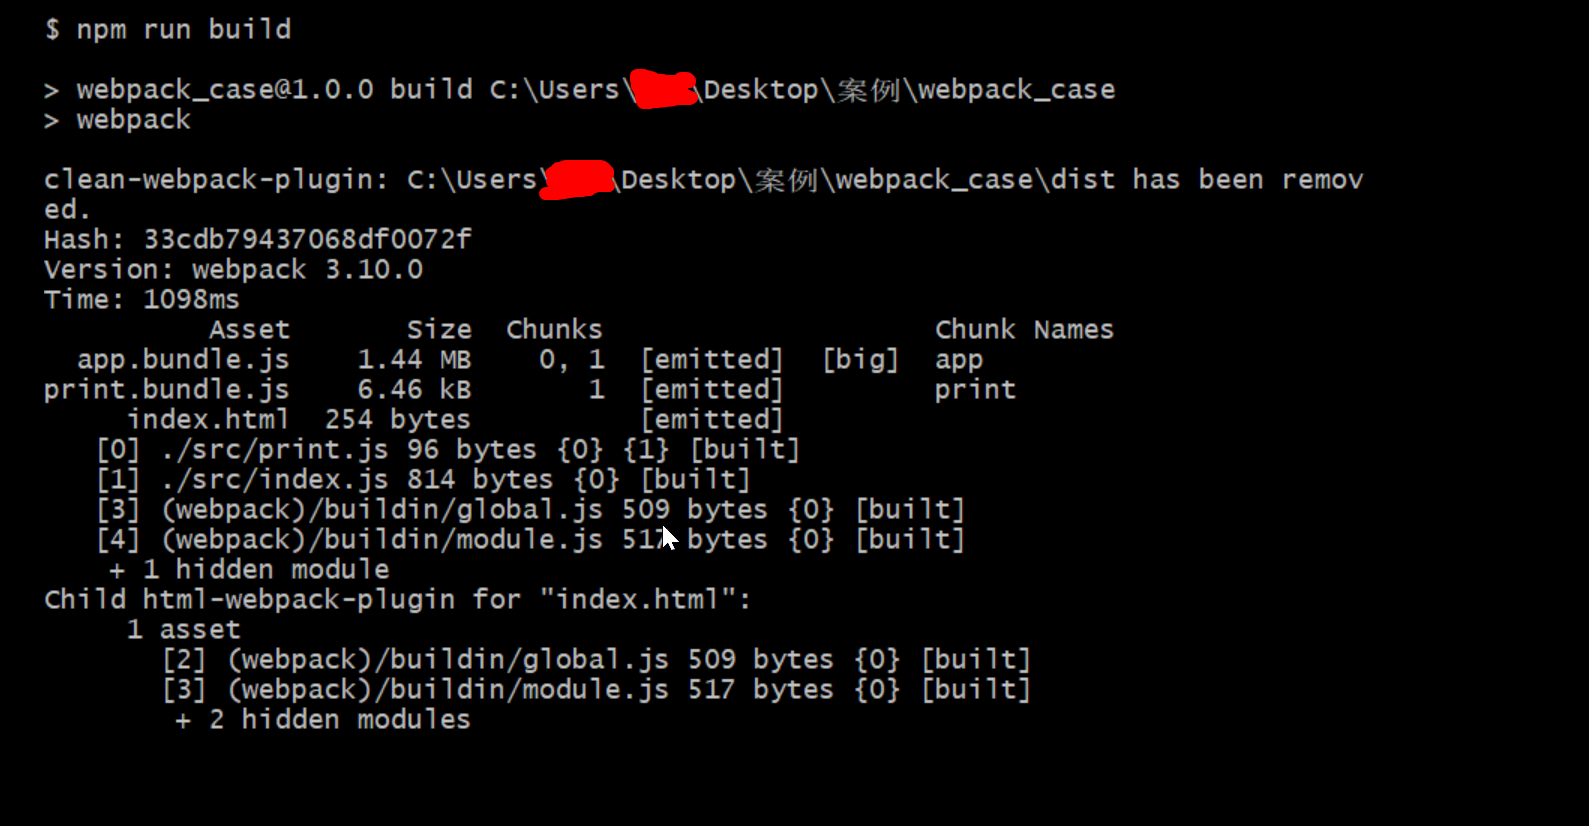
- 当在页面上开始触发之后,错误的地方才会显示出来,例如本来点击按钮之后,打印的信息有误,则你在点击之后就会在控制台看到错误信息出来
使用webpack构建本地服务器(不需要每次修改就在命令行输入npm run build)
- 安装
npm install --save-dev webpack-dev-server 调整
webpack.config.js文件代码:1
2
3
4
5
6
7
8
9
10
11
12
13
14
15
16
17
18
19
20
21
22
23
24
25
26
27
28module.exports = {
// entry: './src/index.js',
entry: {
app: './src/index.js',
print: './src/print.js'
},
devtool: 'eval-source-map',
plugins: [
new CleanWebpackPlugin(['dist']),
new HtmlWebpackPlugin({
// html中的title标签的内容
title: 'output Management'
})
],
output: {
// filename: 'bundle.js',
filename: '[name].bundle.js',
path: path.resolve(__dirname, 'dist')
},
// S+++++++++++++++++++++++++++++++++++++++++++++
devServer: {
contentBase: "./dist", // 本地服务器所加载的页面所在的目录
historyApiFallback: true, //设置为true,所有的跳转指向index.html
inline: true, //实时刷新
port: 90 // 设置默认监听端口,默认是8080
},
// E++++++++++++++++++++++++++++++++++++++++++++++++
...修改
package.json文件中scripts对象添加如下命令,用以开启本地服务器1
2
3
4
5"scripts": {
"test": "echo \"Error: no test specified\" && exit 1",
"start": "webpack",
"server": "webpack-dev-server --open"
},在命令行中输入:
npm run server即可在本地的90端口查看结果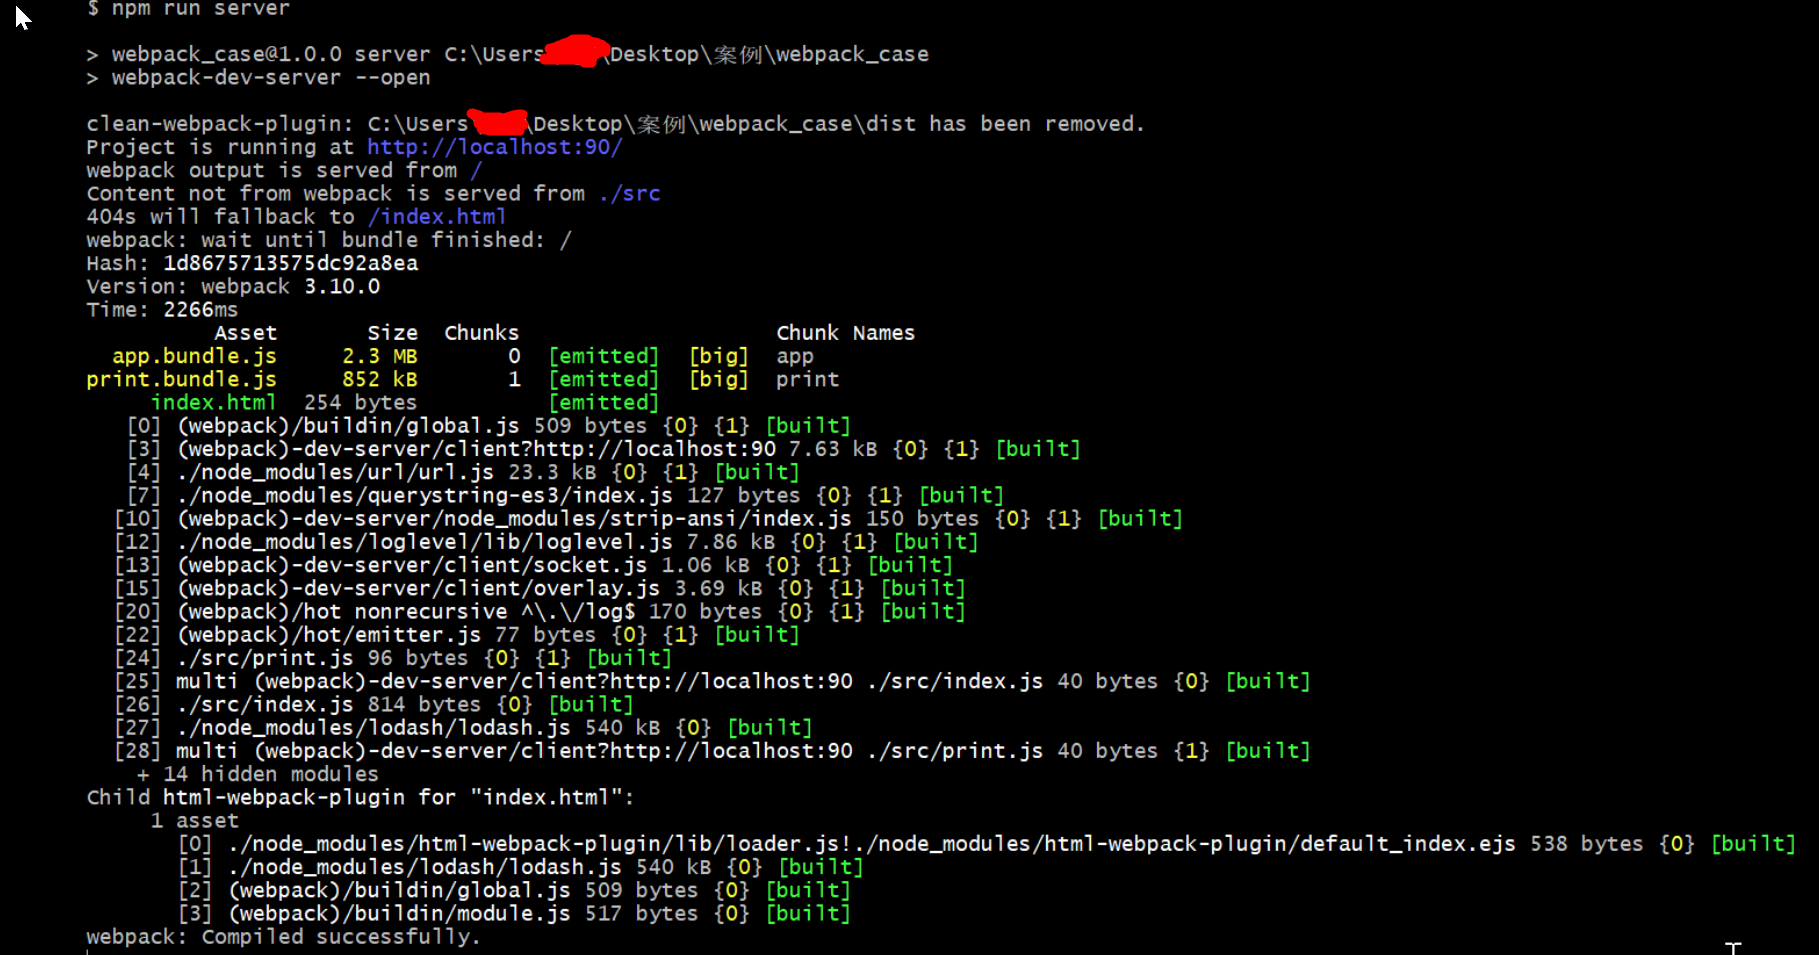
使用webpack-dev-middleware
- 介绍:是一个中间件容器(wrapper),它将通过 webpack 处理后的文件发布到一个服务器(server)。在内部 webpack-dev-server 它使用,然而,它可以作为一个单独的包来提供。webpack-dev-middleware 配合 express server 的示例
- 安装:
npm install --save-dev express webpack-dev-middleware 调整
webpack.config.js文件1
2
3
4
5
6
7
8
9output: {
// filename: 'bundle.js',
filename: '[name].bundle.js',
path: path.resolve(__dirname, 'dist'),
// S++++++++++++++++++++++++++++++++++++++++++++++++++++++++++++++++++++++++++
// 也会在服务器脚本用到,以确保文件资源能够在 http://localhost:3000 下正确访问,端口号之后设置
publicPath: '/'
// E+++++++++++++++++++++++++++++++++++++++++++++++++++++++++++++++++++++++++++
},设置自定义的express服务,创建一个
server.js文件在
package.json文件中添加一个npm script,方便运行服务1
2
3
4
5
6
7
8
9"scripts": {
"test": "echo \"Error: no test specified\" && exit 1",
"watch": "webpack --progress --watch",
"build": "webpack",
"start": "webpack-dev-server --open",
// S++++++++++++++++++++++++++++++++++++++++++++++++++
"server": "node server.js"
// E++++++++++++++++++++++++++++++++++++++++++++++++++
},在终端中执行命令
npm run server,展示如下信息:现在可以通过浏览器输入(http://localhost:3000/)访问项目地址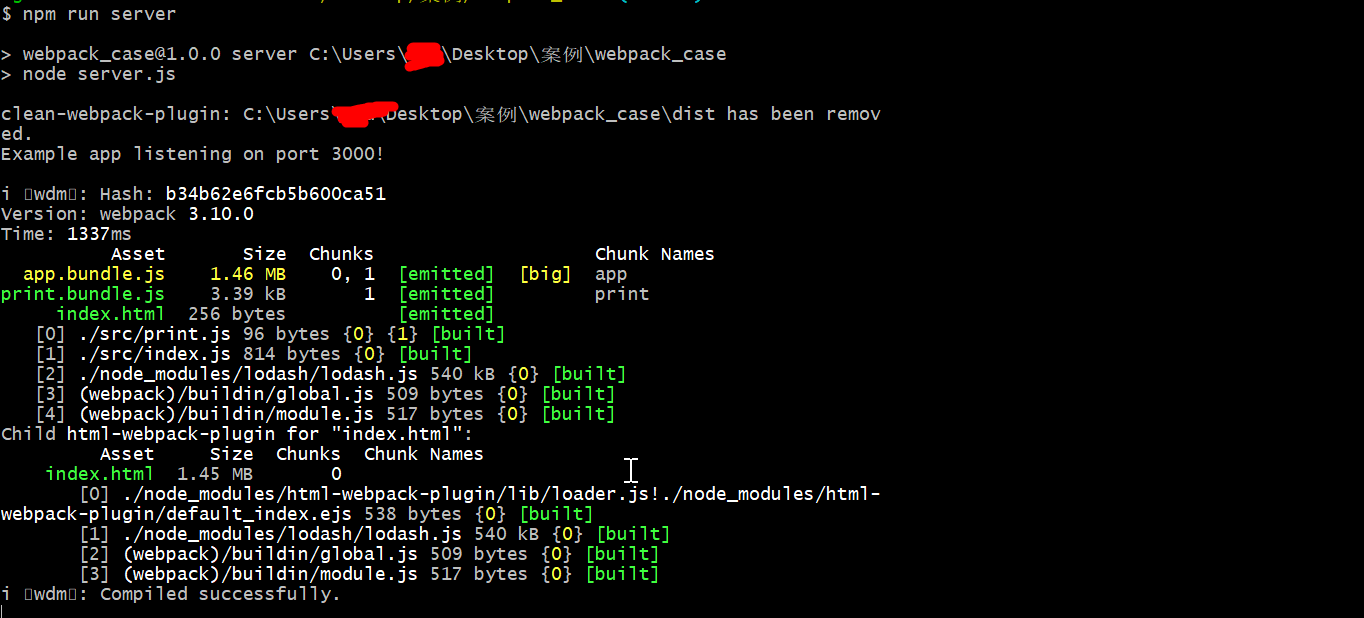
模块热替换(Hot Module Relacement)(只适用在开发环境中)
1.作用:它允许在运行时更新各种模块,而无需进行完全刷新。
启用HMR
更新本地服务的配置,如果仅适用了
webpack-dev-server调整
webpack.config.js,删除print.js的入口文件,因为它被index.js使用1
2
3
4
5
6
7
8
9
10
11
12
13
14
15
16
17
18
19
20
21
22
23
24
25
26
27
28
29
30
31
32
33
34
35
36
37
38// S+++++++++++++++++++++++++++++++++++++
const webpack = require('webpack')
// E++++++++++++++++++++++++++++++++++++++
module.exports = {
// entry: './src/index.js',
entry: {
app: './src/index.js',
// print: './src/print.js'
},
devtool: 'eval-source-map',
plugins: [
new CleanWebpackPlugin(['dist']),
new HtmlWebpackPlugin({
// html中的title标签的内容
title: 'output Management'
}),
// S+++++++++++++++++++++++++++++++++++++++++++++++
new webpack.NamedModulesPlugin(),
new webpack.HotModuleReplacementPlugin()
// E++++++++++++++++++++++++++++++++++++++++++++++++
],
output: {
// filename: 'bundle.js',
filename: '[name].bundle.js',
path: path.resolve(__dirname, 'dist'),
// 也会在服务器脚本用到,以确保文件资源能够在 http://localhost:3000 下正确访问
publicPath: '/'
},
devServer: {
contentBase: "./dist", // 本地服务器所加载的页面所在的目录
historyApiFallback: true, //设置为true,所有的跳转指向index.html
inline: true, //实时刷新
port: 90, // 设置默认监听端口,默认是8080
// S+++++++++++++++++++++++++++++++++++++++++++++++++
hot: true
// E+++++++++++++++++++++++++++++++++++++++++++++++++
},或者通过命令更改
webpack-dev-server --hotOnly
- 如果使用了
webpack-dev-middleware,请看https://github.com/glenjamin/webpack-hot-middleware
Tree Sharking
精简输出
- 添加一个能够删除未引用代码(dead code)的压缩工具(minifier) - UglifyJSPlugin
- 安装
npm i --save-dev uglifyjs-webpack-plugin - 调整
webpack.config.js文件内容1
2
3
4
5
6
7// 删除未引用代码的插件
const UglifyJSPlugin = require('uglifyjs-webpack-plugin')
...
plugins: [
new UglifyJSPlugin()
],
...
结论
- 使用 ES2015 模块语法(即 import 和 export
- 引入一个能够删除未引用代码(dead code)的压缩工具(minifier)(例如 UglifyJSPlugin)
生产环境构建(product)
配置
- 安装’npm install –save-dev webpack-merge’,并将之前指南中已经成型的那些代码再次进行分离
- 删除
webpack.config.js,创建webpack.common.js, webpack.dev.js, webpack.prod.js等文件 重新配置npm scripts
1
2
3
4
5
6"scripts": {
// 生产环境脚本
"build": "webpack --config webpack.prod.js",
// 开发环境脚本
"start": "webpack-dev-server --open --config webpack.dev.js"
},在生产环境中使用
source-map,在开发环境中使用inline-source-map
指定环境
- 许多 library 将通过与 process.env.NODE_ENV 环境变量关联,以决定 library 中应该引用哪些内容
- 在生产环境中,调整
webpack.prod.js文件1
2
3
4
5
6
7
8
9
10
11
12
13
14
15
16
17
18
19
20
21
22// S+++++++++++++++++++++++++++++++++++++++++
const webpack = require('webpack');
// E+++++++++++++++++++++++++++++++++++++++++
const merge = require('webpack-merge');
const UglifyJSPlugin = require('uglifyjs-webpack-plugin');
const common = require('./webpack.common.js');
module.exports = merge(common, {
devtool: 'source-map',
plugins: [
// new UglifyJSPlugin()
new UglifyJSPlugin({
sourceMap: true
}),
// S++++++++++++++++++++++++++++++++++++++++++++++++++
new webpack.DefinePlugin({
// .NODE_ENV 是一个由 Node.js 暴露给执行脚本的系统环境变量。
'process.env.NODE_ENV': JSON.stringify('production')
})
// E++++++++++++++++++++++++++++++++++++++++++++++++++
]
});
代码分离
代码分离方式一:入口起点(entry points)
1.使用 entry 配置手动地分离代码。
1
2
3
4
5
6
7
8entry: {
app: './src/index.js',
print: './src/print.js'
},
output: {
filename: '[name].bundle.js',
path: path.resolve(__dirname, 'dist'),
},
代码分离方式二:放置重复(prevent duplication)
1.在plugins选项中添加webpack内置的插件
1
2
3
new webpack.optimize.CommonsChunkPlugin({
name: 'common' // 指定公共 bundle 的名称。
})